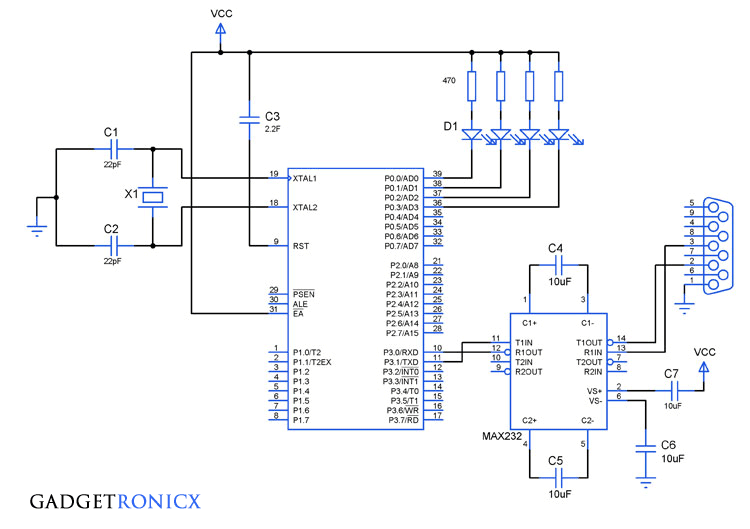
Keypad interfacing plays a important role in taking inputs to the microcontroller.This tutorial covers interfacing of 4×4 keypad with 8051 microcontroller and explains how the microcontroller process input from the keypad.The input processing from keypad is done by means of a method called scanning.
In this Scanning method the keys are connected in such a way one end of the keys was connected in rows and another end was given to column respectively thereby forming 4 x 4 keypad.Each row was connected to a pins in the port and columns to other pins respectively.
SCANNING KEYS:
After connecting the rows and columns to their respective ports as shown in the above circuit diagram then its time to scan them and look for inputs.
In order to scan the keypad we will start with keeping (either row or column) value as constant and change either row or columns input to observe the change when the keypad is pressed.In simple words we are going to use one as input and another as output.The below steps will explain this better.
- Rows will be the inputs and columns will be output.
- Apply logic 1 to all rows in the keypad one by one.
- Read the status of columns one by one now.
- Say for example if row 1 in keypad is high and in this exact instant if switch "2" of that row was pressed then the pin P3.5 to which the "2nd" switch was connected will read low.
- This low signal in that P3.5 pin tells the controller that switch 2 is pressed.
- By this way every row will be continuously scanned infinite times and controller looks for key press in the keypad.
Since the speed of the Microcontroller was very high it scans the whole keypad in fraction of seconds, so there is no chance of missing a pressed key.The speed of scanning depends on the frequency of the crystal used in the Microcontroller.
We will assign values to each keys through code.I have added the LED's in the port 0 in order to illustrate the working of the switches connected to the microcontroller.
That is i have written the program in such a way that whenever a key was pressed corresponding LED will light up.The LED's was connected in the common anode mode so whenever logic 0 applied to port 0 LEDs will light up.
Now lets move into the Programming the controller for scanning the microcontroller.The program was written in Embedded C language and the software used was Archimedes IDE 8051.
CODE:
#include

           #include

            unsigned char i;                         //Assigning Integer  void main()                                //Main program  {  P0=0x00;                                  //Initialising Port 0  while(1)                                    //Infinite loop to run the program infinitely  {  P0=0xff;                                   //Giving high values to Port 0.P2=0xfe;                                  //Making row "1" of the keypad low.P3=0xf0;                                 //Giving logic 1 to all the columns        i=P3;                                       //Giving the values of port 3 to integer i  {  if(i==0xe0){P0=0xfe;}            //Checking switches 1,2,3,4  else if(i==0xd0){P0=0xfd;}     else if(i==0xb0){P0=0xfb;}     else if(i==0x70){P0=0xf7;}     }  P0=0xff!P2=0xfd;                                  //Make row "2" of the keypad low   P3=0xf0!i=P3!{  if(i==0xe0){P0=0xfc;}            //Checking switches 5,6,7,8  else if(i==0xd0){P0=0xf8;}     else if(i==0xb0){P0=0xf1;}     else if(i==0x70){P0=0xf0;}     }  P0=0xff!P2=0xfb;                                //Making row 3 of the keypad low.P3=0xf0;                                   i=P3!{  if(i==0xe0){P0=0xfc;}             //Checking switches 9,10,11,12  else if(i==0xd0){P0=0xf8;}      else if(i==0xb0){P0=0xf1;}      else if(i==0x70){P0=0xf0;}      }  P0=0xff!P2=0xf7!P3=0xf0!i=P3!{  if(i==0xe0){P0=0xfc;}            //Checking switches 13,14,15,16  else if(i==0xd0){P0=0xf8;}     else if(i==0xb0){P0=0xf1;}     else if(i==0x70){P0=0xf0;}     }  }
Hope this tutorial was informative to you.Docheck out entire tutorial of 8051 programming.


